Getting Started
Welcome to Cronofy. The Cronofy Scheduler is how teams coordinate the full scheduling lifecycle - from setting availability to booking and managing events.
This article will help you set up your account, add the Cronofy browser extension, and configure your calendar availability. You'll also find guidance on setting up your Organizational Unit, configuring conferencing for your team, and more.
Follow the steps below to get started. Click on the icons below to jump to the section you need.

What is the Cronofy Scheduler?
The Cronofy Scheduler is a simple tool for complex scheduling tasks. It basically generates scheduling links that your invitees can open and choose a free time to book with you, based on you availability in real time. Your availability is provided by your Google or Microsoft calendar which can seamlessly connect to Cronofy, so that you can create events hassle free.
How do I sign up with Cronofy?
The Scheduler offers a straightforward SSO sign up process, allowing you to choose between Google or Microsoft Office 365 (via Graph API) based on your preferred calendar provider.
- To sign up click on create an account, choose your desired data center and click continue with either Google or Microsoft Office 365. Work email, is for only the developer login or specific users and will not work for other users.
- After which we will ask you to authorize Cronofy to access to your calendar. For more information on what data we process and what access we have to said data, you can visit our Data Management Policy.
- Finally you will need to create an OU (Organizational Unit) in Cronofy and give it a name. If you have been invited to Cronofy by another user you will be asked if you want to join their OU.
Cronofy offers a 14 day free trial for new accounts, after which regular charges apply according to our pricing page.

When is a developer account needed?
A developer account is not needed for everyday users of the Scheduler but is used in order for developers to create their own scheduling features using the API. If you have a developer account you need to sign in using the Work email tile.
What information does Cronofy store and use?
Nggyu Limited, Cronofy Limited and/or Cronofy B.V. (we, us, our, Cronofy) is committed to protecting your privacy and personal data.
This policy sets out how Cronofy collects, handles and stores data to meet our data protection standards, fulfil the rights of our customers, end-users and meet the requirements set out by regulators and the law.
You can visit our Data Management page to learn more about how we securely process and store your data. Any further questions about this can be addressed to our support team.
How do I login to Cronofy?
To login you can choose again between Google or Microsoft Office 365 (via Graph API) based on your preferred calendar provider. You must sign in with SSO (Single Sign-On) by clicking the "Continue with " option.
Ensure you choose the correct data center associated from the dropdown, with your account when you registered.
Work email, remember is for only the developer account and will not work for most users.

What are preferences in Cronofy?
Preferences are where you define the times you are available, how events are setup, conferencing, working hours, event location and more.
We split preferences in Cronofy in two categories:
Availability
Here is where you will define the time you are available, in turn we will translate these to time slots that a invitee can choose from.
Event Details
Are where you would set the technical parameters of events like conferencing, rescheduling options etc.
The choices you make here will be set as defaults when you create a new request and when someone book with you through your public link.
When you first access Cronofy you will have some default ones, like a standard work week availability - 9 to 5 etc.
How to setup your preferences?
Preferences are located in the left-hand menu on the main page. Set these in accordance with your needs. These are always set initially to default values, so you don't need to change them to start scheduling with Cronofy.
- Your work hours, the time you are available during the week. Click to drag and edit your availability in the table below.
- Included calendars, you will already see the calendar you signed up with, and you can add more to share your availability.
- Interview times, set automatic placeholders in interviewers' calendars that can be shared as available slots with a candidate.
- Duration, how long you would like events to be.
- Scheduling period, the period you would like to offer slots to recipients.
- Buffers, the minimum number of minutes that must be free before and after calendar events created with these preferences.
- Minimum notice, how much notice would you like to have ahead of an event.

How to setup a public booking link?
A reusable static link for you to share anywhere, where people can book events with you. The parameters of these events are determined by the preferences you set. Visitors can provide their details before scheduling a meeting, and you can set one additional information prompt for them to fill out.
Primary Organizational unit determines under which organization the event is booked, which will set the appropriate branding.
Data capture sets prompts for the invitee to fill out before they can book with you. You can collect the phone number and/or an additional prompt, which can be any question or statement you would like.
Generate new public link if you need a new public link. It will decommission the old one, making it unusable.

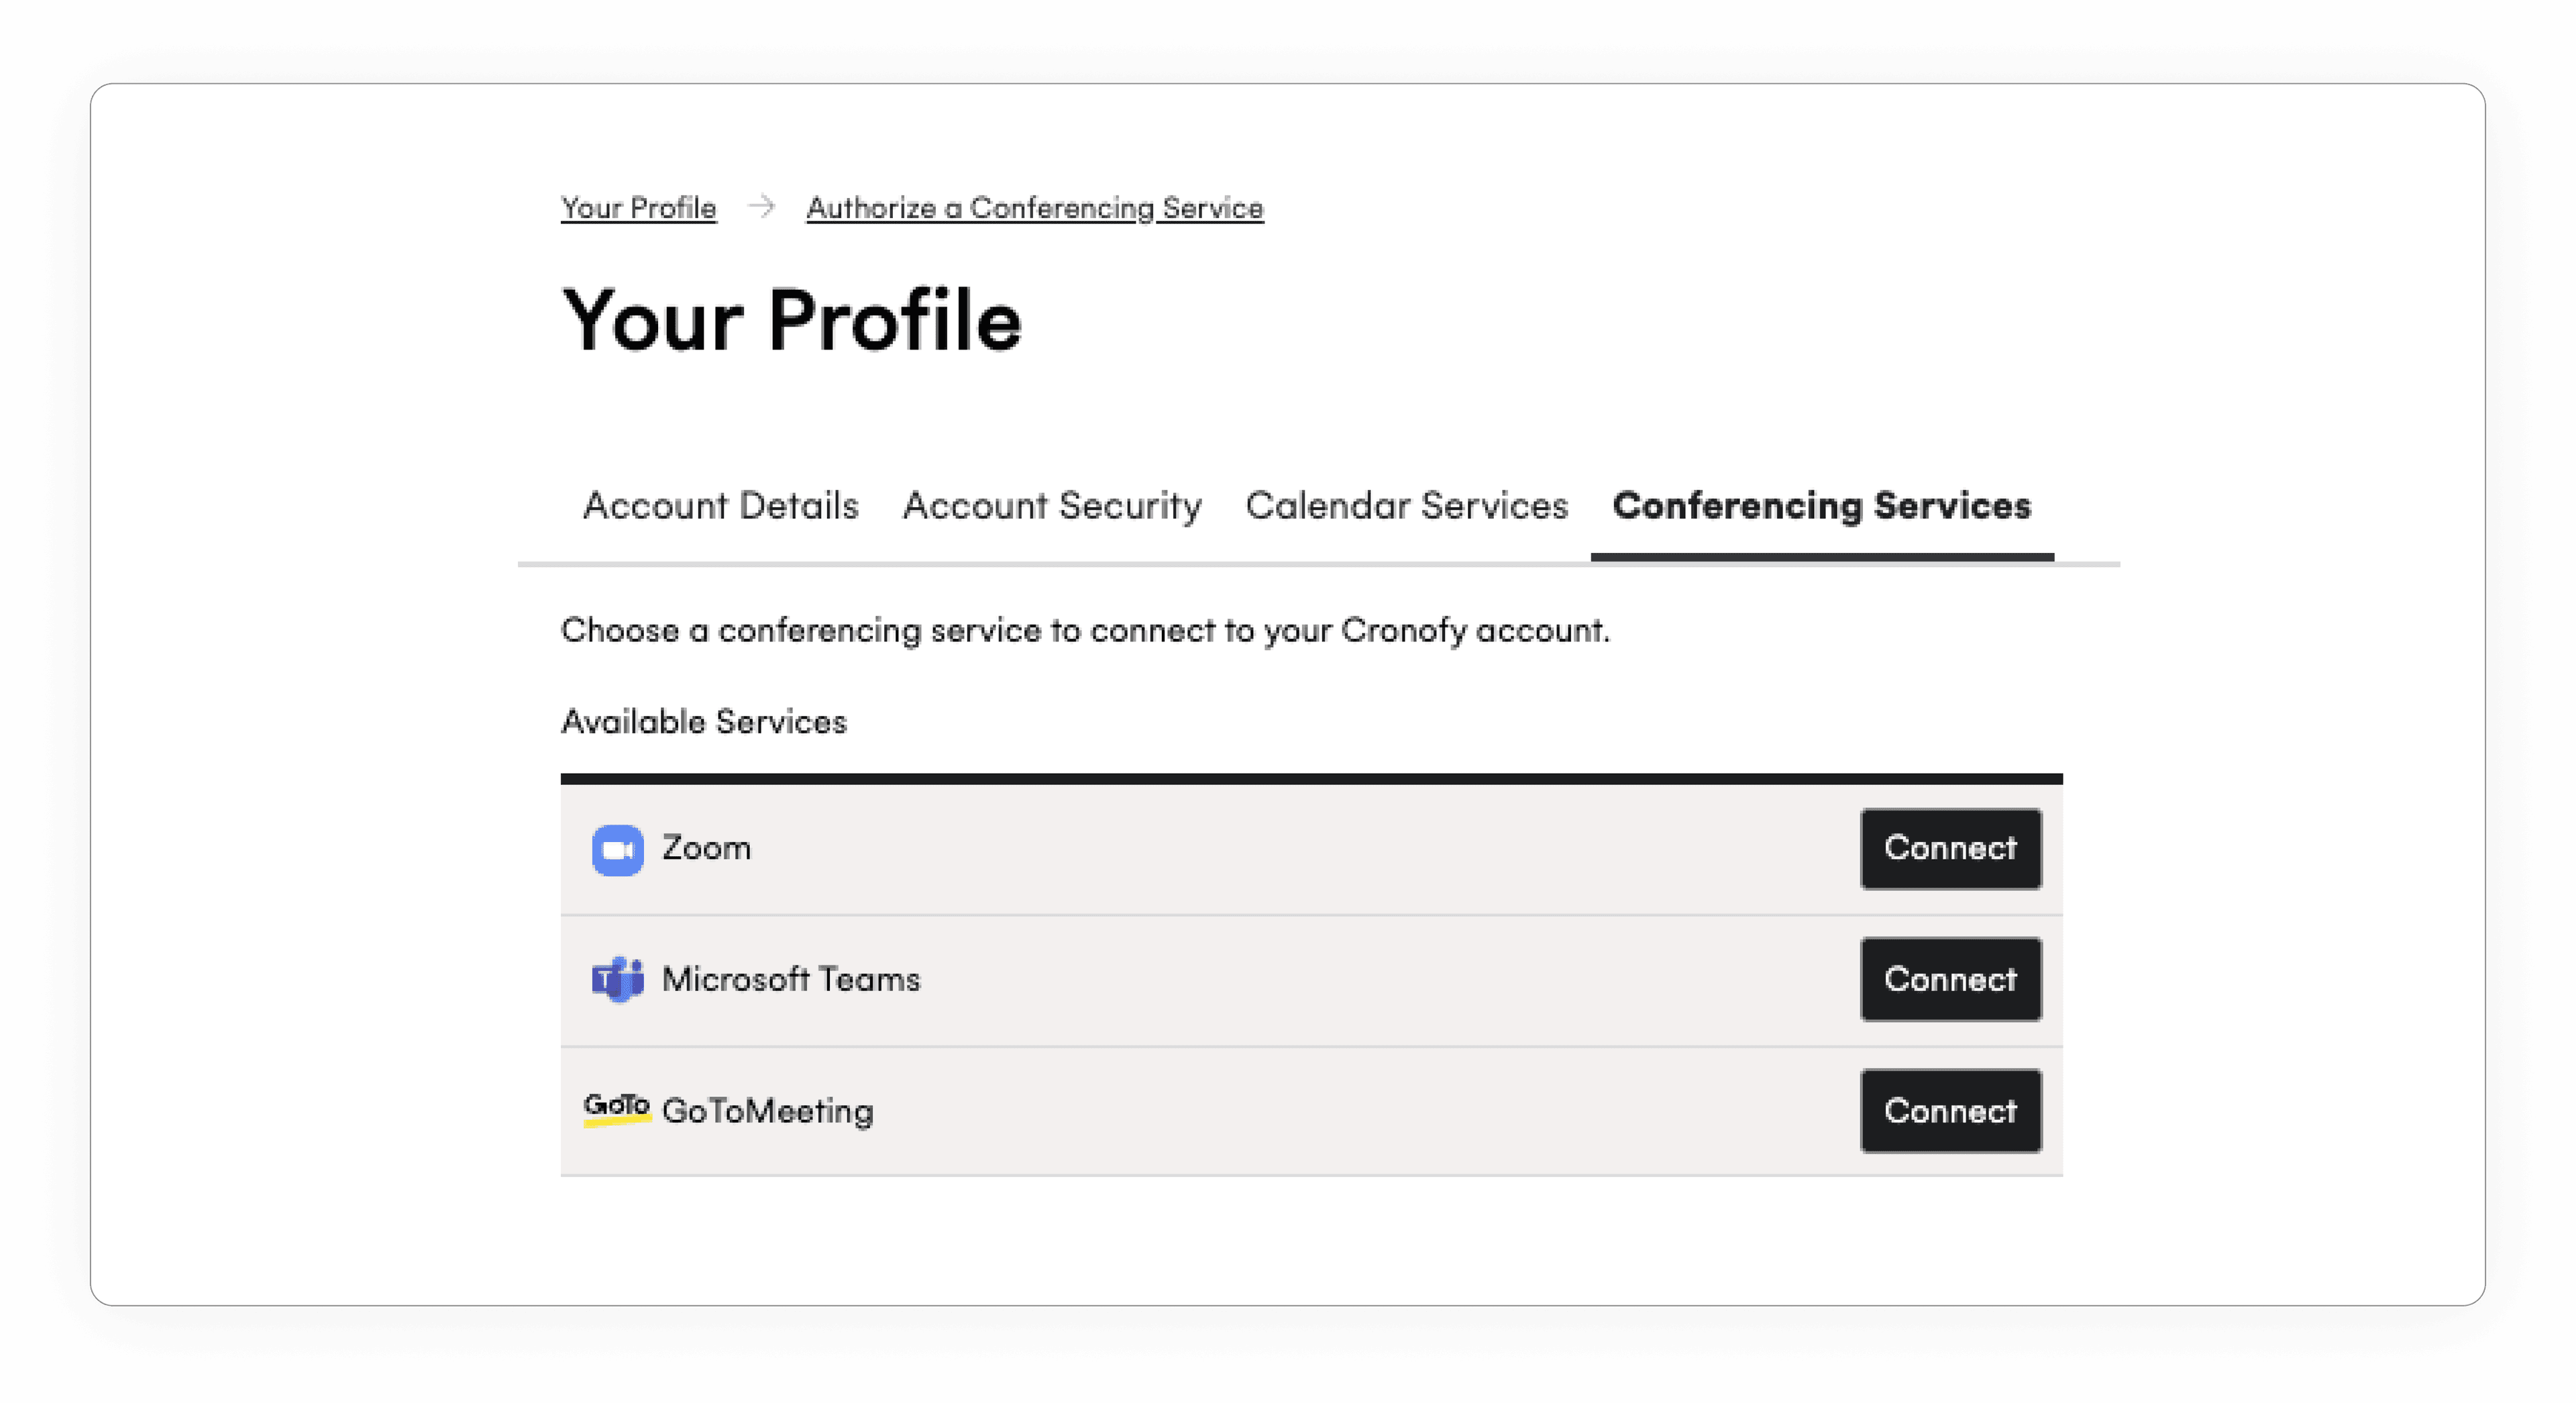
How to setup conferencing?
You can add conferencing services by:
- Head to Preferences.
- Event details and click “Add Conferencing Service”
- Choose your provider and click connect.
- You will taken to an authorization flow, in which you will authorize the provider with Cronofy.
- Done! You can then choose your default conferencing in Event Details.
Alternatively, you can add them in your account.
If your preferred option is not there you can contact our support and we will try to help you.
How to adjust the times you are available?
You can add more calendars to your account and share their availability across them. Keep in mind that you still can only have one target calendar, where event will be placed. You can change the target calendar in event details any time. To add more calendars:
- Head to Preferences.
- Event details and click “Add Calendar Services”
- Choose your provider and click connect.
- You will taken to an authorization flow, in which you will authorize the provider with Cronofy.
- Done! You can now choose which calendars to take into account when sharing by clicking to the + symbol in availability and change your target calendar in Event Details.

What is an organizational unit or OU in Cronofy?
An organizational unit or OU in Cronofy is the environment your account will reside in, like a workspace. Once you sign-up to Cronofy, you will be prompted to create one by naming it, unless you have been invited to one.
You can invite users in this OU to share availability between yourselves and give them roles.
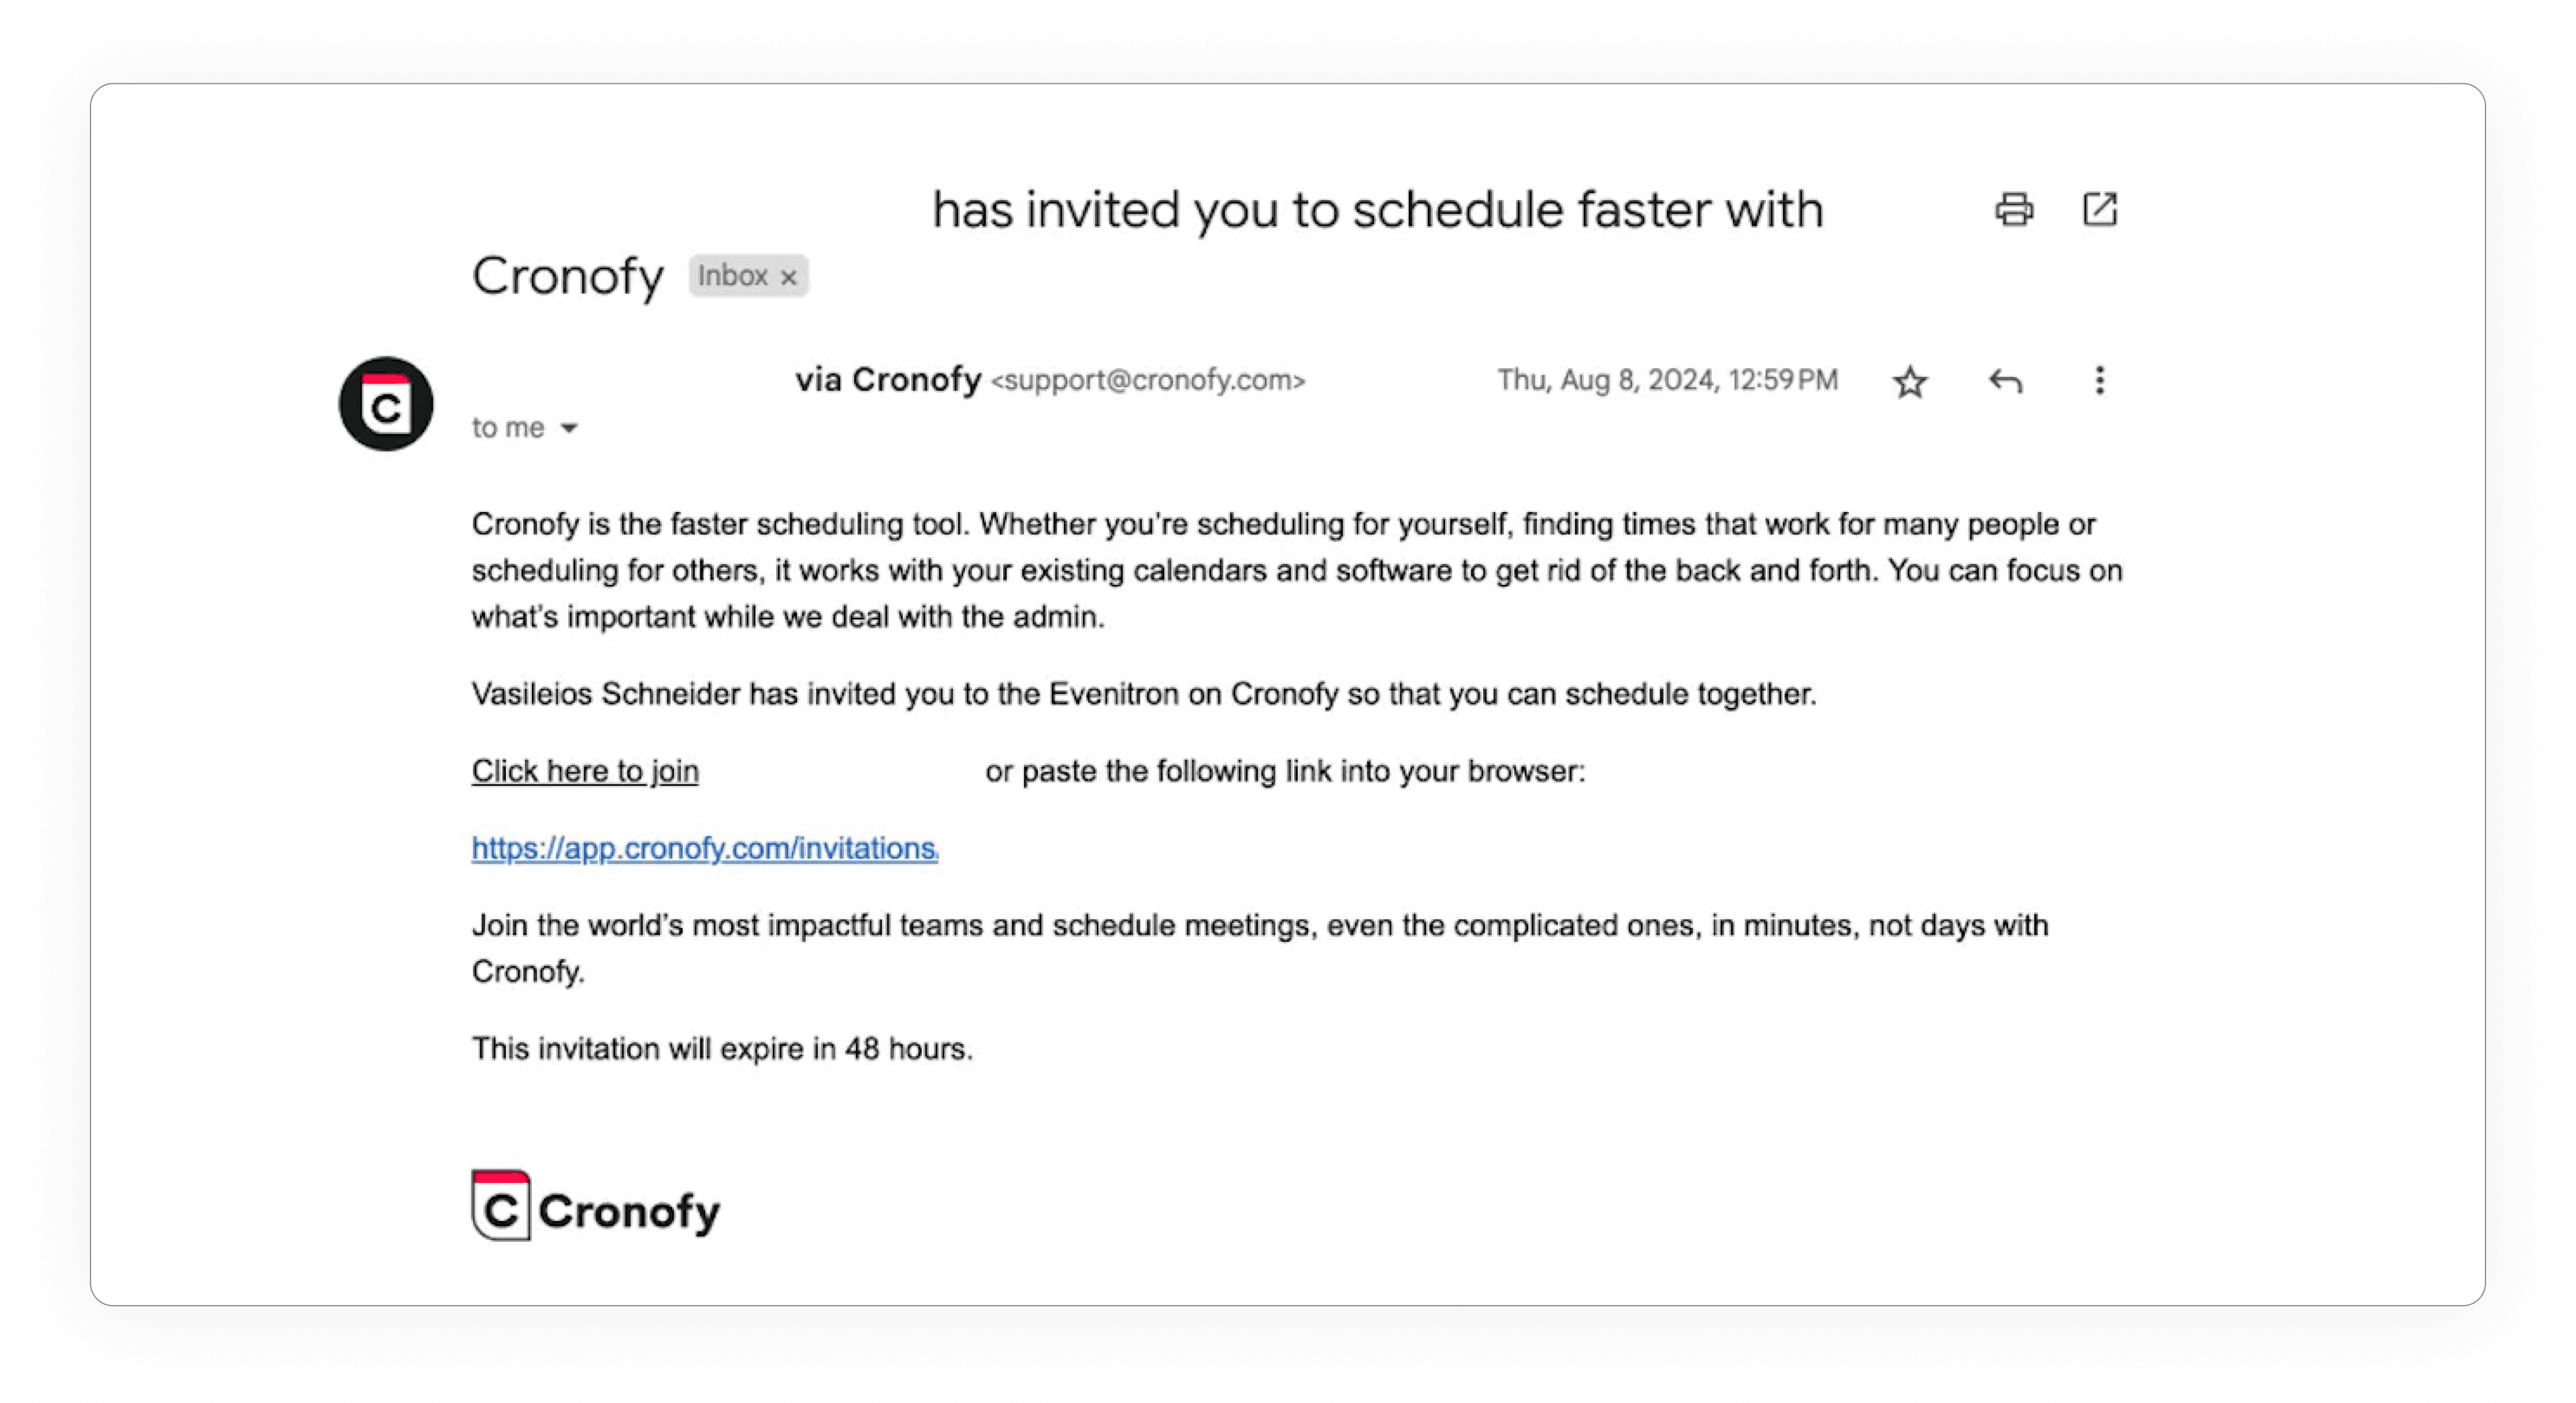
How do I join a specific OU?
To join a specific organization, you will need to have been invited by an owner of that organization. This happens via the invitation email you will receive, once you have it you will be given a choice to Sign in or Sign up with a new scheduler account, if you don't have one yet.
Can I create additional OUs and schedule from there?
To create a new OU you can click on your account name on the bottom left corner in the dashboard. Then click on the "Create a new org Unit"
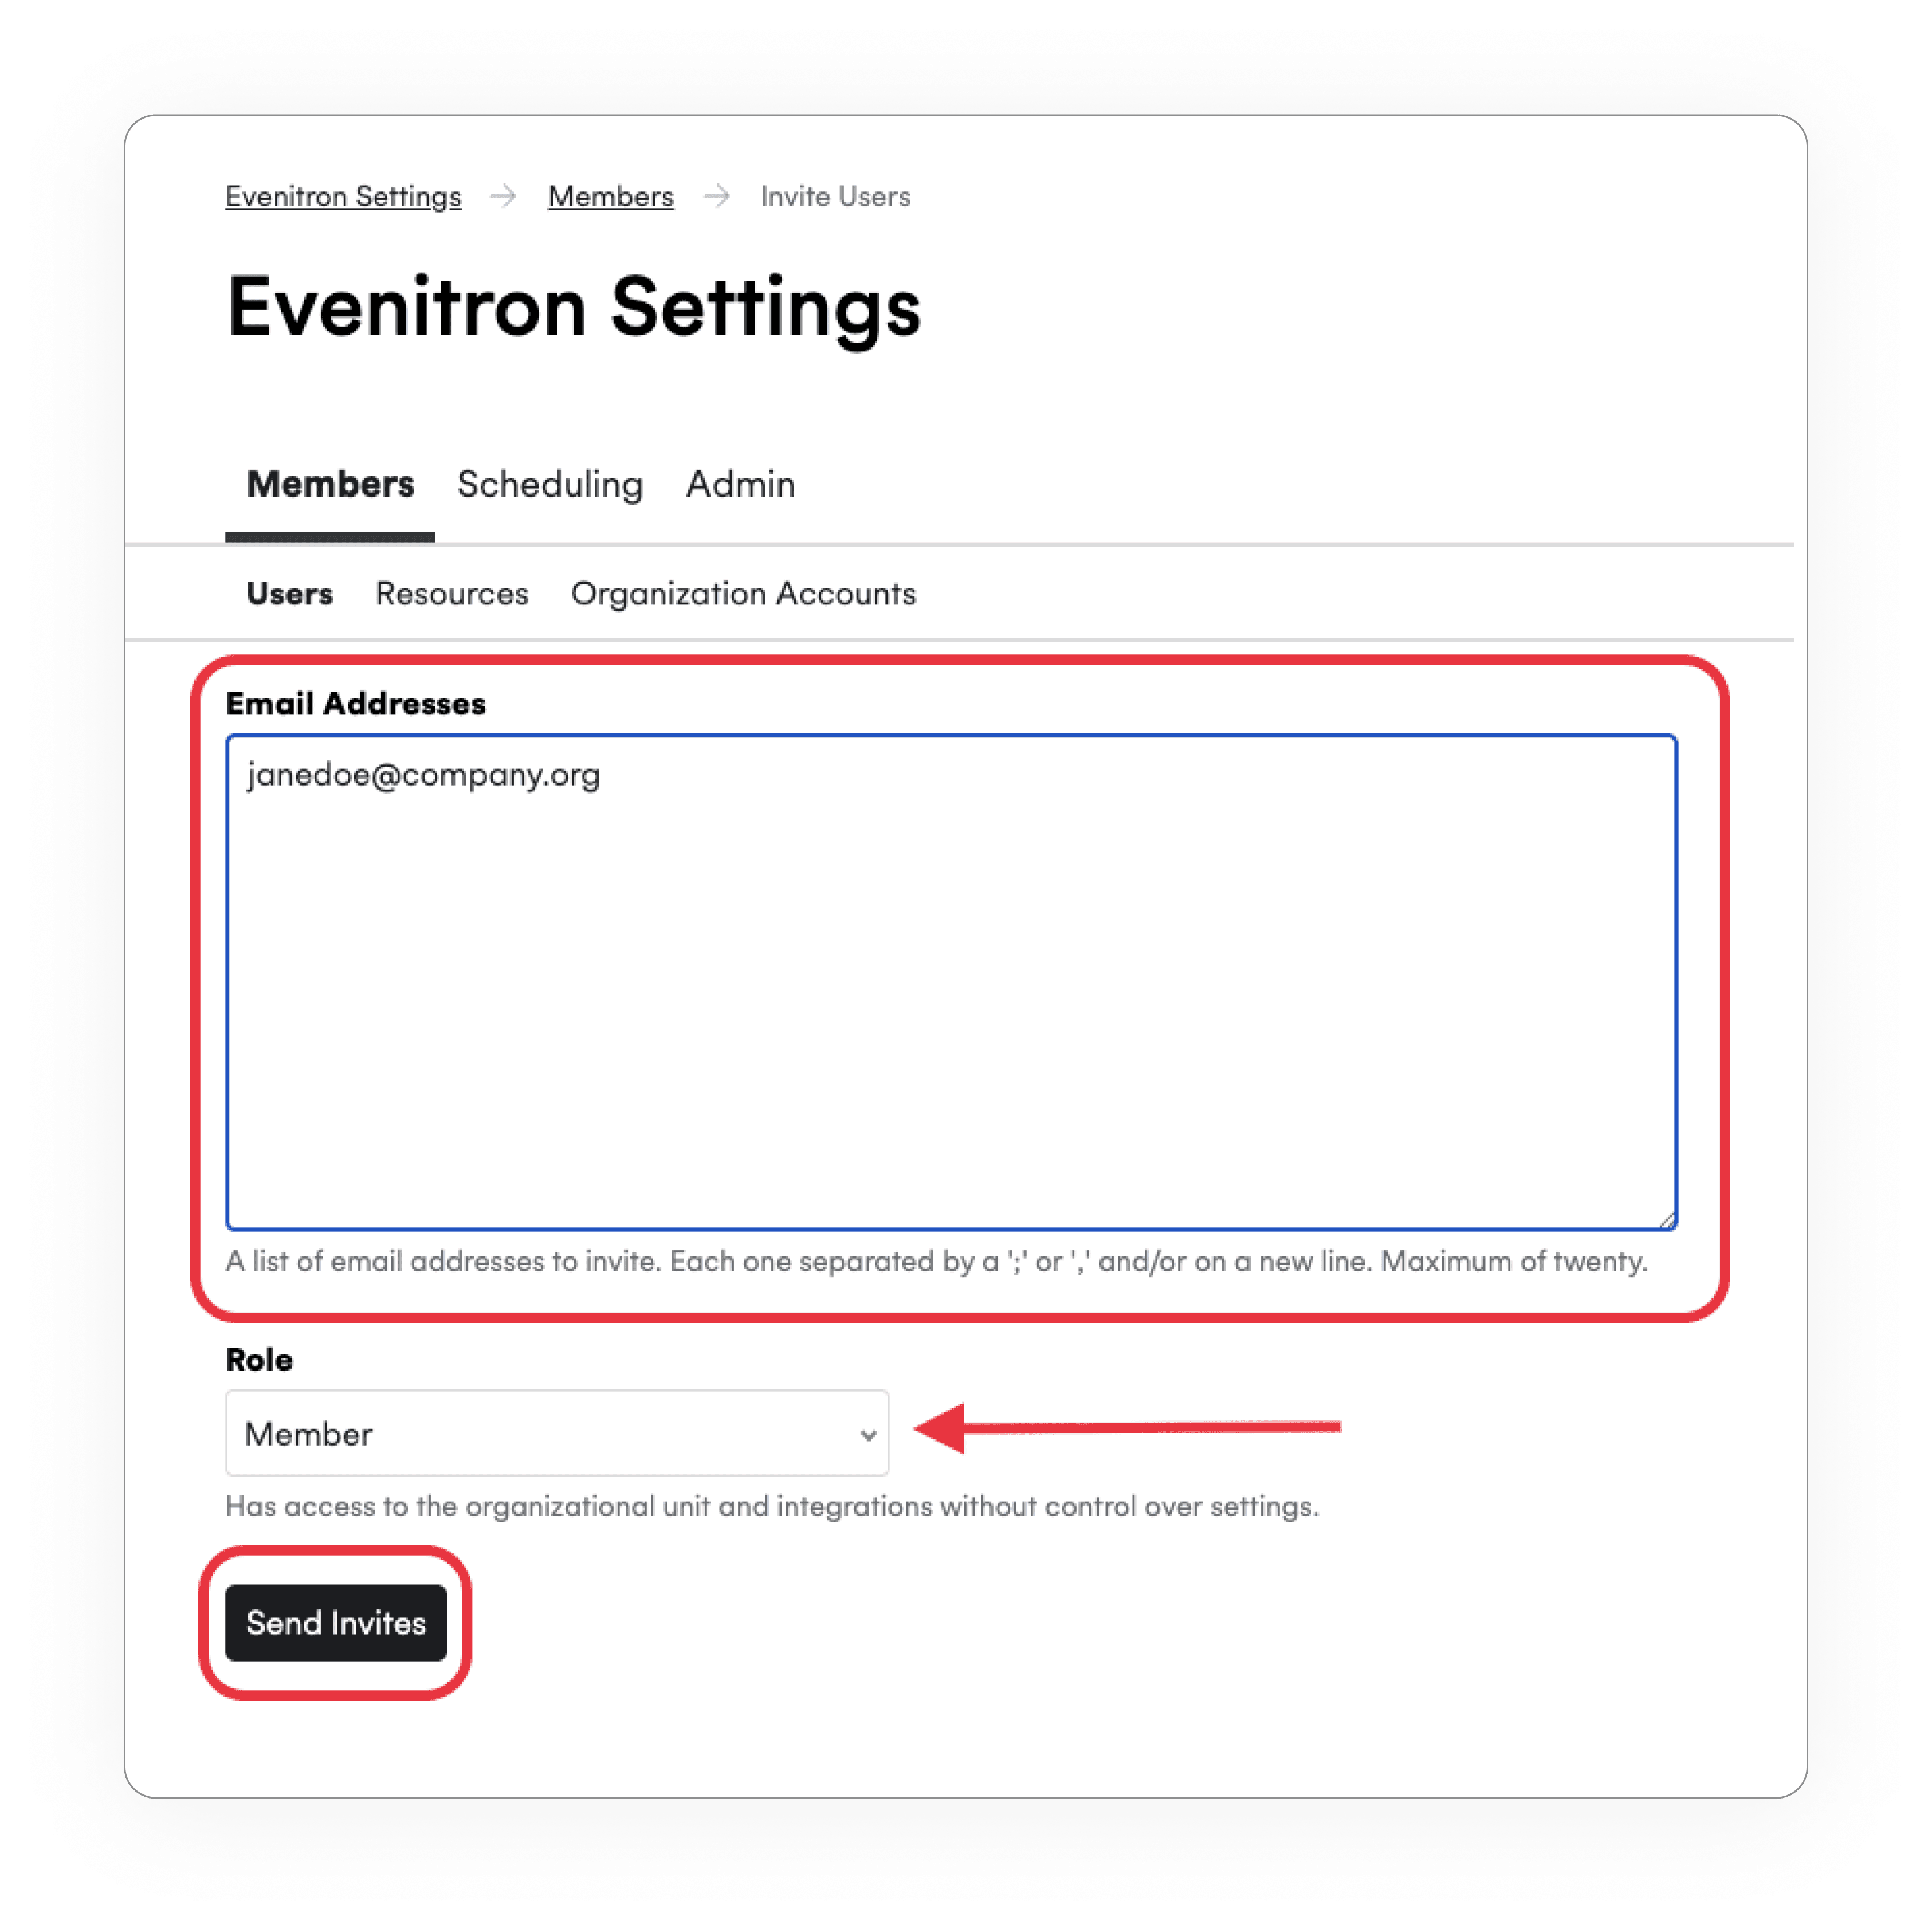
How do I invite more people in my OU?
This is the standard way to invite users to your OU (Organizational Unit). To invite users manually head to:
OU settings -> Members -> Users
Scroll all the way down and select Invite Users. This will open the the invite tab (see screenshot) Now you can enter the emails (up to 20 at a time) of the users you want to invite to your OU.
Below that you will find the roles selector which determines the role of the users you invite. You can read more about roles in this article.
The users will then receive an email prompting them to accept your invite, which is valid for 48hrs.
Can I add more users in bulk?
Enabling directory sync allows us to automatically set up accounts for all of your organization’s users and periodically check for new users, simplifying the onboarding process.
To start, sign up with your workplace admin account, choose your desired data center and click continue with either Google or Microsoft Office 365.
(Work email, is for only developer accounts which are not needed here.)
After that we will ask you to authorize Cronofy to access to your calendar.
Finally you will be prompted to create an OU (Organizational Unit) in Cronofy and give it a name. If you have been invited to Cronofy by another user you will be asked if you want to join their OU. Make sure you have the owner role in Cronofy.

Go to:
OU settings → Members → Organization Accounts
Only users with the owner role will be able to see the option above. From here you will need to connect your workspace to create a service account, to sync your directory.
- Click on "Connect to Google Workspace."
- Download the Cronofy app from the Workspace Store.
- Use your google admin account to authorize the connection.
MS 365
Cronofy needs to make two separate connections: one to your directory and one to your calendars.
- First, connect your directory using the authorizing account.
- Then, select "Connect using MS Graph" if you are using it.
For an Exchange (on-prem) setup :
Follow this guide.
Note: The service account needs to be authorized with a admin account, if it doesn’t work, then you lack the required permissions and need to reach out internally to resolve this.

Go back to:
OU settings → Members → Organization Accounts
you should now see an service account there.
To start syncing users, click "Settings" on the service account that provides access to your organization’s directory. On the settings page, enable provisioning using the toggle, and click "Save."
Google Workspace, one connection provides access to both calendars and the directory.
Microsoft Office, has it on 2 separate and you need to select the "directory".
All users should now start syncing and we will create Cronofy accounts for them.

How do I install the Scheduler extension?
Our web extension enables you to easily create a request from any browser tab. It works with our ATS integrations and automatically detects the invitees email.
Available for :
Click the links above to install the extension on your browser. If your IT department manages extensions, admin approval may be required.
Once installed, sign in to the extension as you would for your account—this only needs to be done once.
Can I install the extension in bulk in my organization?
An admin in your company can auto-install the extension for all users on their browser.